Step by step tutorial
So you have discovered SAMMI… I can only say: Welcome to the world of endless possibilities!
We will walk you through a step by step tutorial on how to set up SAMMI, and connect it to OBS and your Twitch account. You will also learn how to create your first button, add a command and trigger it via Twitch chat.
1. Install all dependencies #
- Download and install OBS Studio. As of now, SAMMI does not support other streaming software.
- Download and install OBS Websocket This is how SAMMI communicates with OBS Studio. You can download OBS Websocket 5.0 along with the OBS Websocket 4.9-compat in order to preserve backwards compatibility. However, this means you will need to set up two instances of OBS in SAMMI, one using 5.0 and one using the 4.9-compat version. For the time being, until you are sure your extensions have been fully updated to use OBS Websocket 5.0, we suggest staying on 4.9.1.
2. Download SAMMI #
We recommend selecting 64bits release.
Unpack the zip file and place the folder anywhere in your computer, preferably in your non windows drive.
3. Launch SAMMI #
Navigate to the unpacked folder and launch SAMMI Core.exe.
Allow the app through the firewall if there’s a prompt and you’re ready to start!
4. Connect SAMMI to your OBS #
-
In your OBS go to Tools-Websocket Server Settings. Uncheck ‘Enable authorization’ (for easy setup, you can change it later) and press OK.
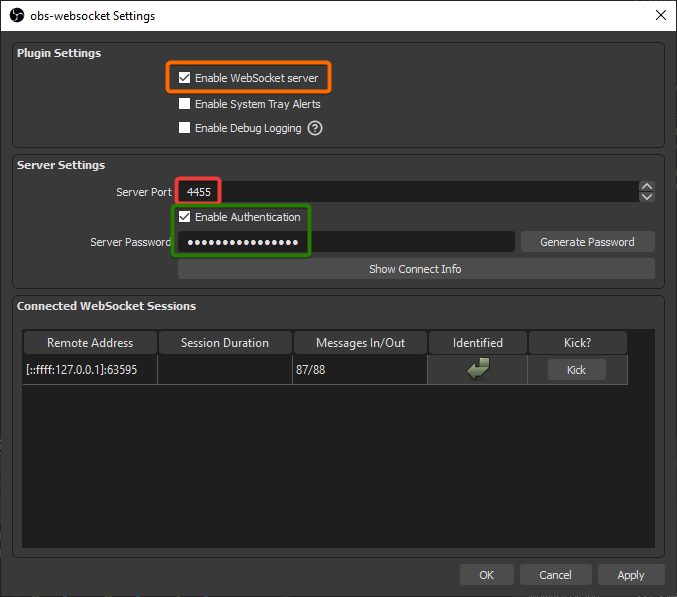
OBS Websocket Settings
-
In your SAMMI, click on OBS Connections at the bottom menu. Unless you changed your port in OBS-Tools-Websocket Server Settings or set up a password, you can leave everything at default and press Connect.
You should see a yellow notification messageOBS [Main] Connectedand the status indicator forMain OBSin the left bottom corner should change from red to green.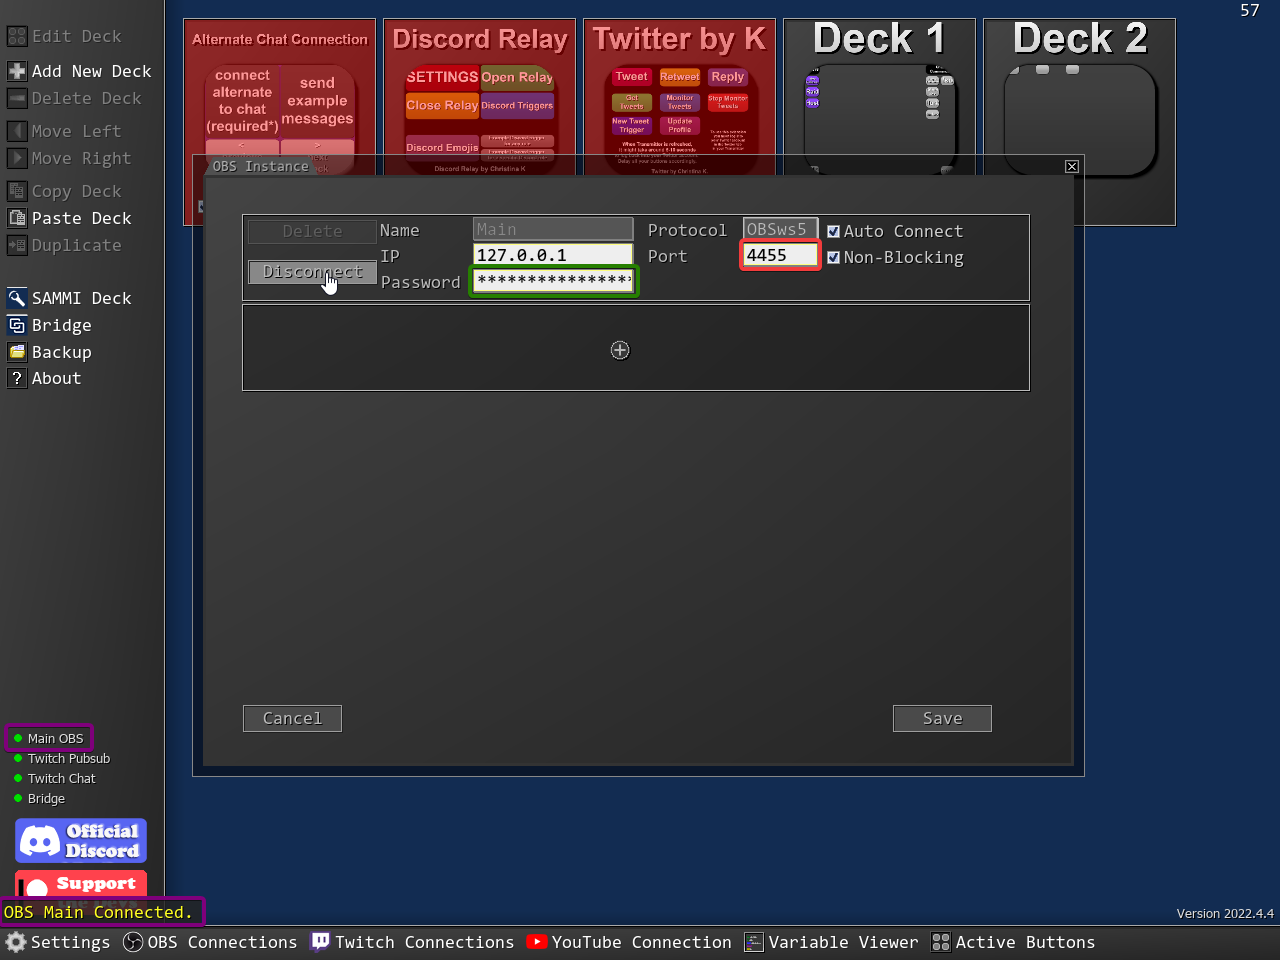
OBS is connected
5. Add Bridge to your OBS Dock #
In your OBS menu navigate to View - Docks - Custom Browser Docks. Your new dock name can be Bridge and the URL will be the path to the bridge.html file located in your SAMMI/bridge folder.
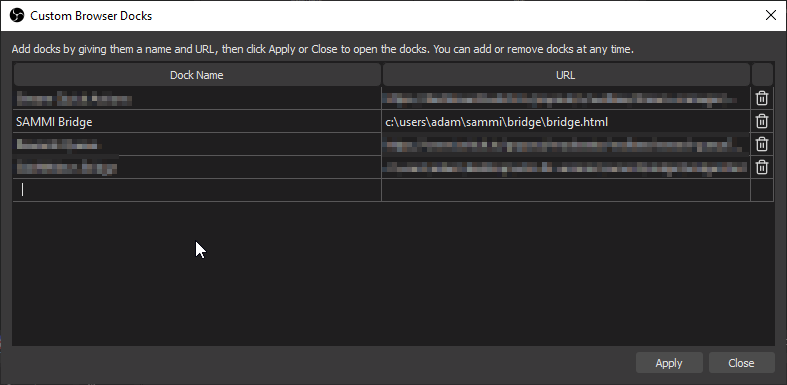
Press apply and you should see your new dock. If it does not pop up for some reason, you can always go to View - Docks - Bridge.
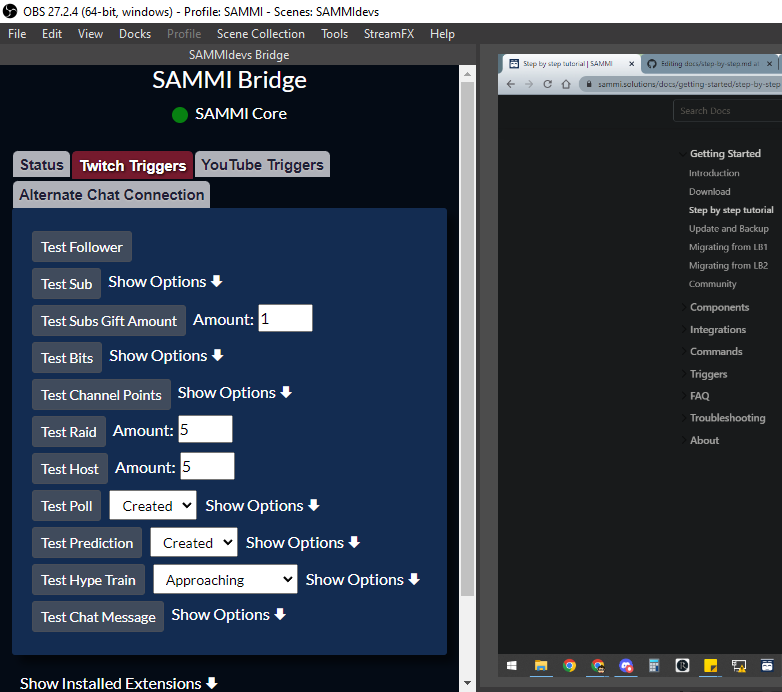
Fit your new dock somewhere in your OBS screen as you see fit.
6. Connect Bridge to SAMMI #
In your SAMMI-Settings menu, check Allow SAMMI Deck and Bridge to allow Bridge to connect.
In your Bridge-status tab (in our OBS dock), you can now modify your connection settings.
Default IP address for SAMMI is always 127.0.0.1 and port is always 9425. Unless you changed port in your SAMMI-Settings, you can leave it at its default value.
You must fill out the password if you decided to use one in SAMMI-Settings menu.
Note that you only need to do this once, as your Bridge will remember the previous settings and will attempt to auto connect next time.
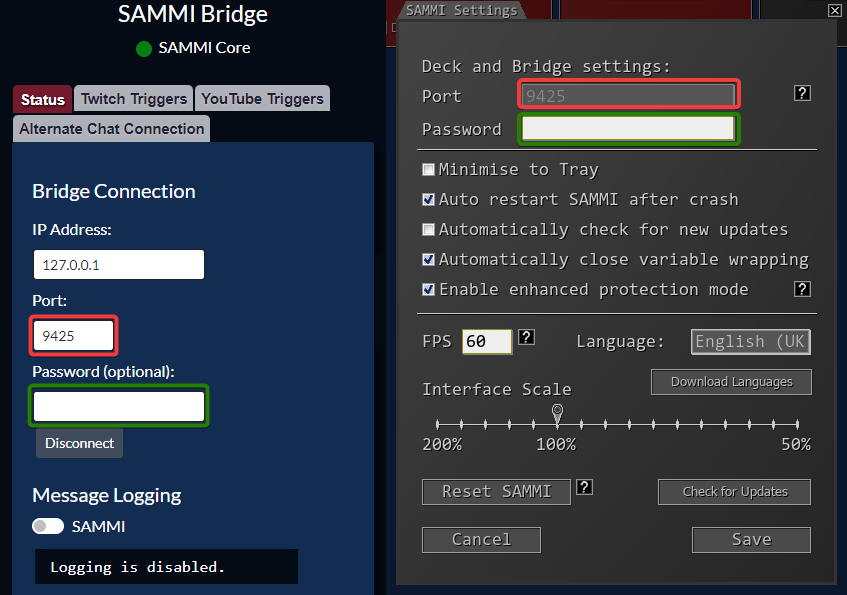
In your Bridge you should now see Connected or next to SAMMI. This means it is connected to your SAMMI and listening for messages.
7. Link your Twitch account #
Linking your Twitch account to SAMMI is a necessary step if you want to be able to listen to alerts and control your Twitch via SAMMI.
You can link multiple Twitch accounts, however in this tutorial we will focus on connecting your main account.
- In your SAMMI click on Twitch Connections button.
- Click on Open URL which should open a new browser window and redirect you to Twitch to authorize SAMMI.
- Press Authorize and wait to be redirected again to see
All good, you can go back to SAMMI nowmessage in your browser. - Back in SAMMI you should now see your Twitch account in the list!
- You can now optionally check which events to listen for and whether you want to Join Chat Channel for this particular Twitch channel. You want to also check
Auto connect to Twitch Chat, else you will need to always press the Connect Twitch Chat button when you open SAMMI to be able to receive and send chat messages from SAMMI. -
Press Connect Twitch Chat to connect to Twitch chat.
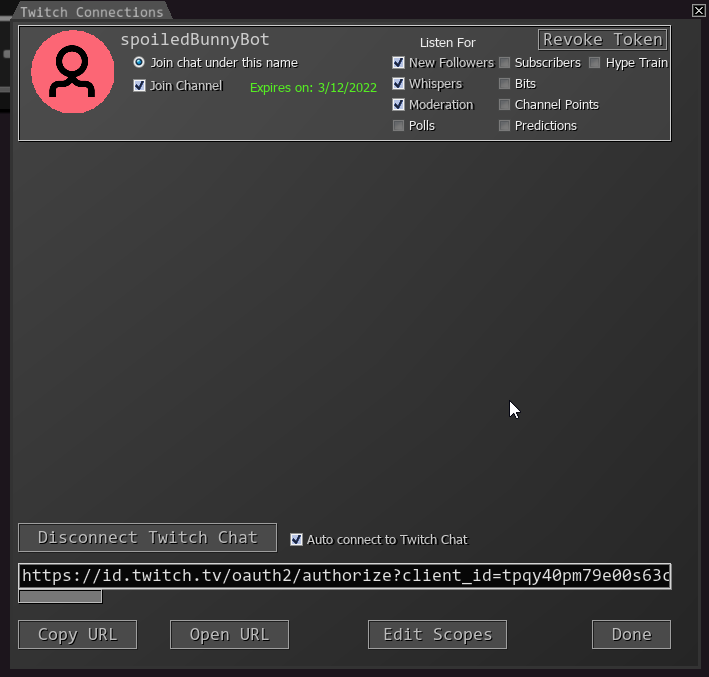
Active Twitch Connection
-
Now that your Twitch account is linked in SAMMI, Pubsub status in your Bridge should change to Connected or
.
Remember you Bridge must be running at all times to be able to listen to Twitch events.
Pubsub connected
8. Create your first button #
In this part of the tutorial we will learn how to create a button with a simple command and add a Twitch chat trigger to it.
You can follow the text instructions or click on to watch a short video.
-
In your SAMMI click on Add New Deck button. You should see a newly created blank deck named Deck 1. Double click on it.
-
You will see an empty grid. This is your deck where you can create new buttons. Right click anywhere in the empty area and select Create Button or simply double click. A new empty button will be created. You can optionally add some text to it as well by right clicking on the button and selecting Edit Appearance.
-
Right click on the empty button - Add Commands or double click on it.
-
Click on the + symbol. A dropdown menu will appear. Click on Twitch Commands and select Twitch: Send Message (you can also just start typing
messagein the search box). -
Populate the fields:
Message- Put a random text in there. For exampleHello World!.Channel Name- Leave empty
-
Back at our main deck view, right click on the new button - Edit Triggers. This is where you can assign a Twitch event (such as new subscriber or chat message) to automatically trigger your button.
- Click on the + sign and selected Twitch Chat from the dropdown menu.
- Remove the
*in the Message field and populate it with!test. - Press Save.
- Once you're back at your main deck view, press Save. We have now created a button that will send a chat message
-
Back in your main SAMMI menu, press SAMMI Deck to open it. This is your SAMMI Deck where you can manually press buttons you create in your SAMMI.
sammi only acts as an editor. You can press your buttons in SAMMI Deck.Once launched, you will see connection settings. As we are just keeping everything at default in this tutorial, you can press Connect. Selected deck should be Deck 1. Press Load Deck and you should see your newly created button that we named
Send message. -
While looking at your Twitch chat, click on the button in your SAMMI Deck. It should send a
Hello Worldmessage to your chat!
Important: Your SAMMI must be running and connected to Twitch Chat (SAMMI-Twitch Connections-Connect Twitch Chat). -
Try typing
!test(or anything else you chose to be your trigger) in your Twitch chat while looking both at your chat and SAMMI Deck.
Two things should happen:- You will see the button in your SAMMI Deck blink, just like when you manually pressed it with your mouse.
- SAMMI will respond back with
Hello Worldin your Twitch chat.
Hello World anytime it's triggered. We have also created a Twitch chat trigger which will execute the button any time someone types !test in your Twitch chat.Trigger the button manually from SAMMI Deck #
Trigger the button via your Twitch chat #
Do you still remember the Twitch chat trigger you configured for your button? If you followed the tutorial, it should be !test.
Now you have learned how to create a button, add a command and trigger it via Twitch chat! You can find more information about the individual components, commands and triggers in the next sections of the documentation.